Deploying an Application in Disconnected Mode
When using Coreograph in disconnected mode, you download the deployment packages you compile, and use the AWS console to launch, update, and delete the CloudFormation stack that is created for each instance of the application you deploy. You may deploy a Coreograph application in as many AWS accounts as you wish, and depending on how the application has been parameterized and how its resources are named, you may be able to deploy it more than once in a single account. A fairly ordinary way to organize things is to create development, test and production accounts under the umbrella of an organization – the additional accounts at AWS cost nothing on their own, it is only resources that cost money – and deploy several instances of an application in the course of its lifetime.
Later we will be announcing the availability of connected mode, in which many of the details of uploading, launching,, updating and deleting an application are handled automatically through the Coreograph editor. This eliminates a number of the tedious steps below that are required when deploying an application manually. Even so, it may be convenient to share a Coreograph deployment package with someone who is not a Coreograph customer so that they can deploy it in their AWS accounts. They can use the same procedure we outline here to launch, update and delete the application. The point is that you can always use this manual procedure to launch a Coreograph deployment application, even if connected mode is available to you.
The steps of deploying an application manually are as follows:
-
Compile the project and download deployment package (see above)
-
Extract deployment package locally (see above)
-
Create an S3 bucket (deployment bucket) and a directory inside that bucket (deployment path)
-
This bucket must be created in the region in which the application will be deployed
-
-
Upload all deployment files into that directory
-
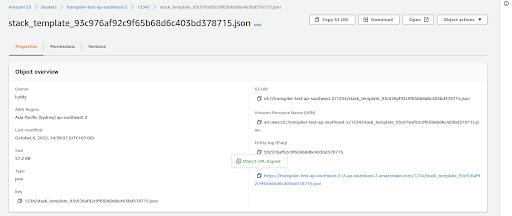
Once the all the files are uploaded, click on stack_template_xxxx to get Object URL of the CFN template
-
Go to the CloudFormation console, and click Create stack → With new resources (standard)
-
Paste object URL of the template into Amazon S3 URL under Specify template. Then click Next to reach Specify stack details
-
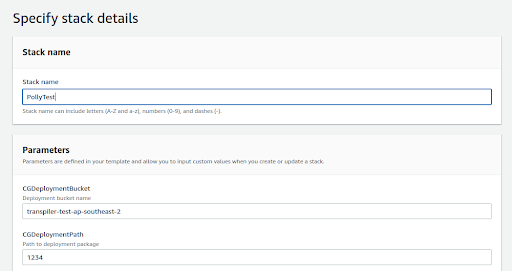
Enter Stack name and stack parameters
-
CGDeploymentBucket = the name of the deployment bucket
-
CGDeploymentPath = the path to deployment files (without leading /)
-
-
Click Next to reach the Configure stack options page, and Next again to reach the Review <StackName> page
-
On the Review <StackName> page, under Capabilities check the I acknowledge that AWS CloudFormation might create IAM resources.
-
Click Create stack
-
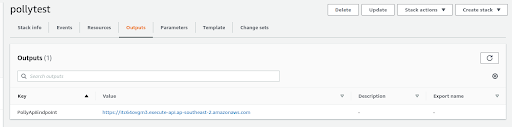
Capture the stack output
PollyApiEndpointthat gives the endpoint (URL) for the API you have just created
This is a screenshot of S3 console after successfully uploading the deployment files to the deployment path within the deployment bucket in step 4 above.. The CloudFormation template file (.json file named stack_template_xxx.json) is selected:
This is a screenshot of selection of the CloudFormation template in step 7:

This is a screenshot after step 8 above, in which the stack parameters CGDeploymentBucket and CGDeploymentPath are specified.
This is screenshot showing the capture of the stack output PollyApiEndpoint in step 12: